INTERFACE ITEM EDITOR

- Save the Item
- Load an existing item
- Create a new item
- To activate help windows
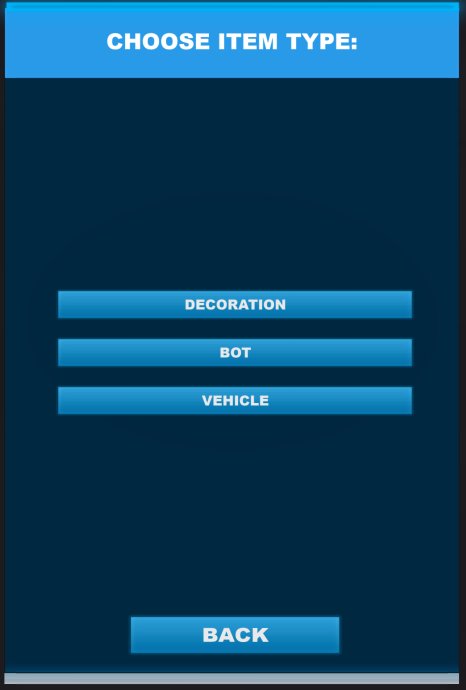
In this tutorial we will only talk about DECORATION items which are the commons items that we can see in the game.
I personally have never tested others (BOT & VEHICLE) but you are free to test it.
At the moment you choose DECORATION, you will be asked to name youe .Item and choose where it will be saved in Documents\Maniaplanet\Items
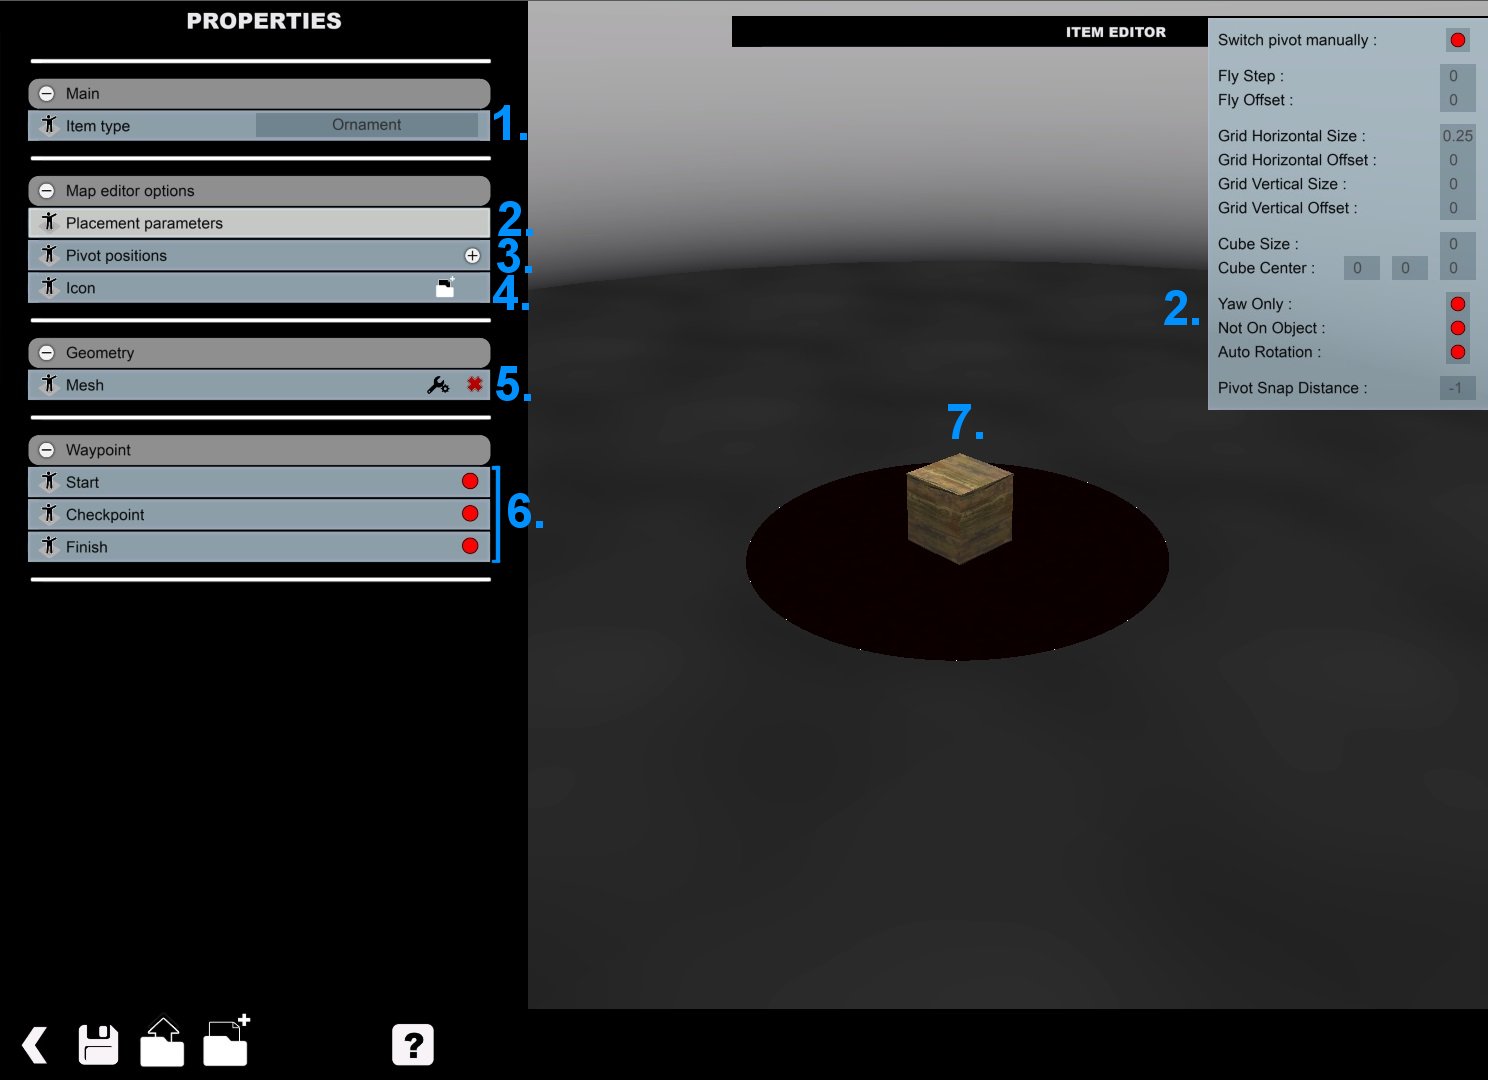
- The type of the item (not editable)
- Placement parameters (click on it to have the pop-up windows at the top right corner)
- Pivot position (you can preset many pivot positions with this option, use “.” or “del” key (On Numpad) to change pivot positions in map editor)
- Icon (You can import your own icon or generate one automaticaly)
- Mesh (You can edit the mesh, change the form, texture…)
- Waypoint (Following if you have created a Layer Spawn position or Sector in your mesh, you can edit this box)
Placement parameters
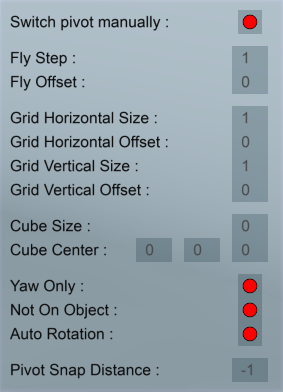
This is on the picture what I recommand.
Switch pivot manually disable : the game will automatically switch pivots to try and match the surface you are trying to place on
!It can be useful in some cases but sometimes annoying. Enable it if necessary
Grid horizontal size and Grid vertical size : correspond to the shift when you move your item in the windows
!It can be interesting to put lower value when item is small and inversely for a big item.
Fly step : This sets the verticale distance the item moves (up and down) in the map editor with “Mouse wheel button” or [page up] [page down]
Auto Rotation : Allow to match face of your item on Nadeo Block only. Keep take to let Grid Horizontal Size & Grid Vertical Size at 0
The rest of options are not understandable to me even after tests. So sorry if I can’t tell you more.
INTERFACE MESH MODELER
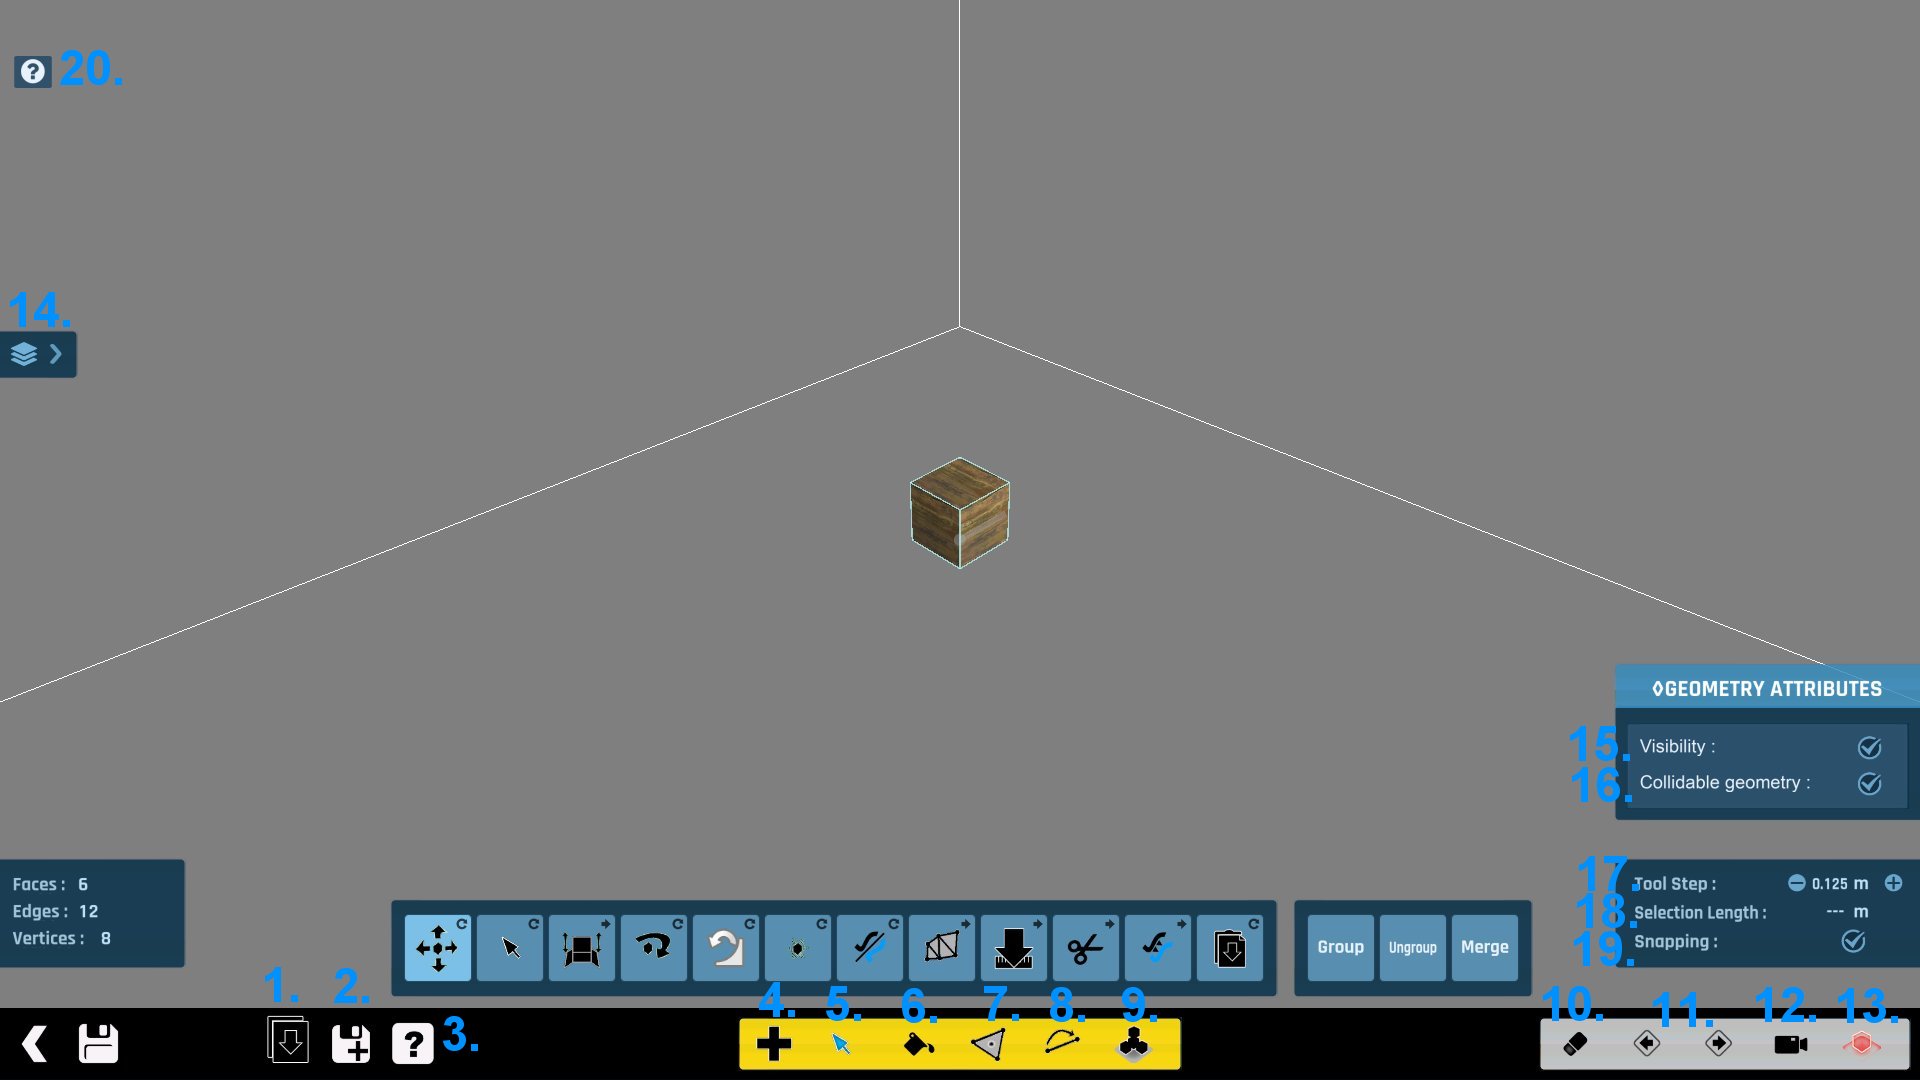
- Import an existing mesh (
.Crystal) - Export the current mesh
- Global & Selection Help
- Creation Mode (Click here for more details)
- Selection Mode (Click here for more details)
- Material Mode (Click here for more details)
- Split Mode (Click here for more details)
- Merge Mode (Click here for more details)
- Prefabs Mode
- Eraser tool (Click on what you want to delete (vertice / edge / face))
- Undo & Redo
- Freelook tool (Left Alt + mouse button to rotate)
- Hide far elements (Seems to not work…)
- Layer Menu (Click here for more details)
- Visibility (It changes the geometry propriety Visible / Invisible ingame)
- Collidable geometry (It changes the geometry propriety Collidable / Uncollidable ingame)
- Tool Step (It changes how your action will move on the grid)
- Selection Length (Display the actual distance of what is selected)
- Snapping (If Active : Selected vertice / edge / face can be snapped to the other existing mesh in the same Layer Geometry)
- Help option (Display the current information following the actived tool)
SHORTCUT
Other Shortcut
GENERAL
Spacebar : Center the camera view on the cursor
CREATION MODE
Right click : Unlock the cursor axis during creation
PolygonMode
Number 1 2 3 4 5 6 7 8 9 to change the number of faces
SphereMode
NumpadSubstract : Increase faces
NumpadAdd : Decrease faces
SELECTION MODE
Ctrl + Left Click : Multiple Selection (You can unselected by the same way)
Ctrl + hold Left Click : Spray Selection (You can unselected by the same way)
Rotate tool
Shift : Toggle rotation axis
Scale tool
Hold Left Shift : Symmetrical scale
MATERIALS MODE
Ctrl + Right Click : Pick current Material
Shift : Toggle rotation axis (for Cylindrical Projection)
Hold Alt + Left Click to move in the UVs map
Mouse Wheel : Zoom in or out in the UVs map
MERGE MODE
Click and drag over mutiple vertices to merge them (the last selected is the destination)
Click and drag over mutiple faces with the same material and UVs to merge

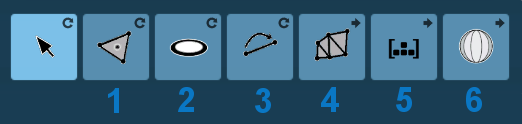
 1. Face Mode : To create variable shape following your imagination
! join the last vertice to the first and press escape to validate your creation
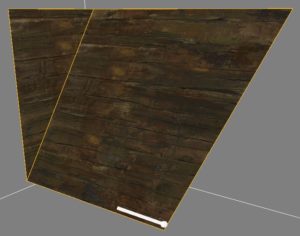
2. Disc Mode : To create circle shape
! My actual way to have less face during the creation is to zoom at maximum and put Tool Step at minimum
! Finally prefer to use Polygon Mode if you don’t want a lot of faces
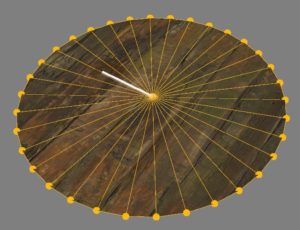
3. Polygon Mode : To create polygon shape
! Use key number 1 (for 10 faces) 2 (for 12 faces) 3 (for 3 faces) 4 (for 4 faces) 5 (for 5 faces) until number 9
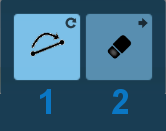
4. Edge Mode : To create a line (Edge)
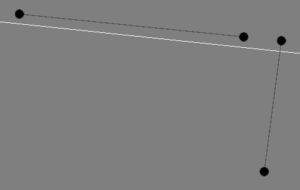
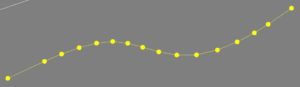
5. Spline Mode : To create a curved line
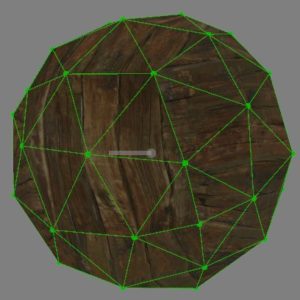
6. Sphere Mode : To create a sphere with triangular face
! Use – or + to change the number of faces

1. Move (M) : Click and Move the object you want. You can also use it to select face, edge…
!Put Tool Step enough high, for example 1 / 2 / 4 , if you want to follow the general grid
2. Select (C) : To select face, edge, vertice
3. Extrude (E) : Select face(s) or edge(s) first then extrude
!Use Right click to unlock the cursor of the usual axis
4. Rotate (R) : Select object(s), face(s) or edge(s) first then rotate
!Shift : Toggle rotation axis
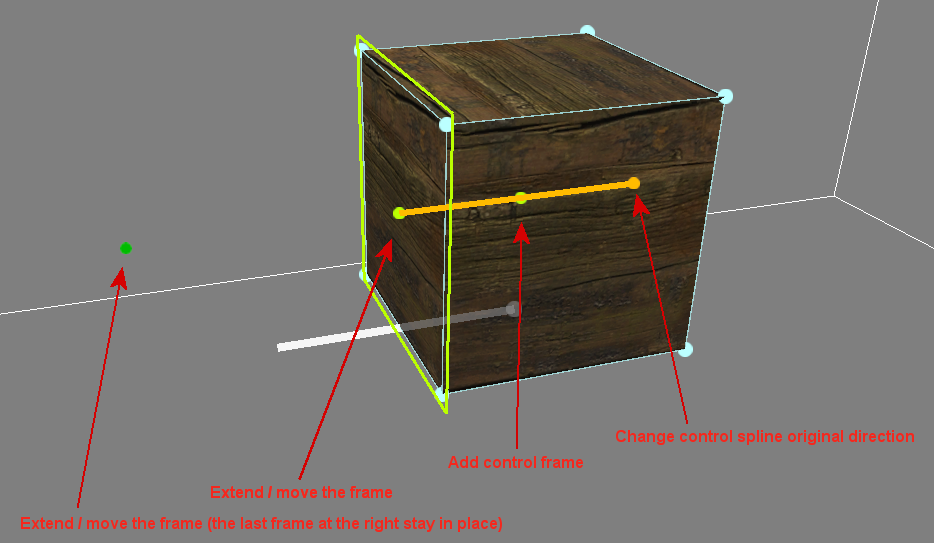
5.Block Transformation : I advice to select object only, click on Block Transformation, the orange dot is to change the direction, the middle lime dot give you option to add control frames, the second lime dot control the existing frame, you can move the frame or make rotation of this one. The green dot allows to extend the object. You can also extend the object with the last frame. The only difference is the frame moves with.
!Create short object if you want to have more control in your curve. In fact, there is a relation between frame and segment (edge cuting your object). It allows to have smoother curve and to have more control by adding frame.
!I invit you to follow this link made by a nadeo’s member for other informations > https://forum.maniaplanet.com/viewtopic.php?f=663&t=44557
!Demonstration Video
6.Scale (S) : Select object(s), face(s) or edge(s) first, click on scale then select which handle that you want
!Hold Left Shift : Symmetrical scale
7.Mirror (S) : Select object(s), face(s) or edge(s) first then mirror and choose which axis you want
8.Fill edges with faces (F) : Following how his your object (if you know you don’t have intentional hole in your object), you can select all (Ctrl + A) then Fill edges with faces. If you want to control face per face, select vertices or edges concerned around the hole then Fill edges with faces
!Works only with quads (4 edges to make the face) or triangles (3 edges to make the face)
9.Move to ground (Ctrl + P) : Select object(s), face(s), edge(s) or vertice(s) first, then Move to ground
!The change stop when the first vertice hit the ground. Unless if all the selection was on the same horizontal plan.
10.Cut (Ctrl + X) : Similar to key Delete. Just select what you want remove
11.Copy (Ctrl + C) : Select object(s), face(s), edge(s) or vertice(s) first, then Copy
12.Paste (Ctrl + V) : Select object(s), face(s), edge(s) or vertice(s) first, then Paste
13.Group / 14.Ungroup : You can group or ungroup independant object(s). It allows to apply some functions on them but not all, and in edition (when you click twice on an object), you can only edit individually each object.
!This option can be a little confusing cause there are many layers of selection. You can group independant object(s) to move, remove them for example, but if you want to edit face, edge, it works individually.
15.Merge : You can merge detached objects. For that you have to prepare connection between edge(s) (same configuration). Move close your object then Merge.
Demonstration Video

1.Select texture you want, when texture are surrounding by a red rectangle, it doesn’t advice to use it.
2.You can create your own Material. Before you have to prepare your files following which Material you want.
TDSN (Diffuse/Specular/Normal) TDOSN (DiffuseOpacity/Specular/Normal) TDOBSN (The opacity is not binear contrary to TDOSN) TDSNE (Diffuse/Specular/Normal/Energy) TDSNI (Diffuse/Specular/Normal/SelfIllum) TDSNI_Night (Work during night only) TIAdd (SelfIllum)
!I invit you to follow this link made by a nadeo’s member for informations > https://forum.maniaplanet.com/viewtopic.php?f=663&t=44713
3. Apply texture to selection. You have to define a dots. The bleu dot corresponds to the left bottom corner on the texture. It can avoid you to use Custom material.
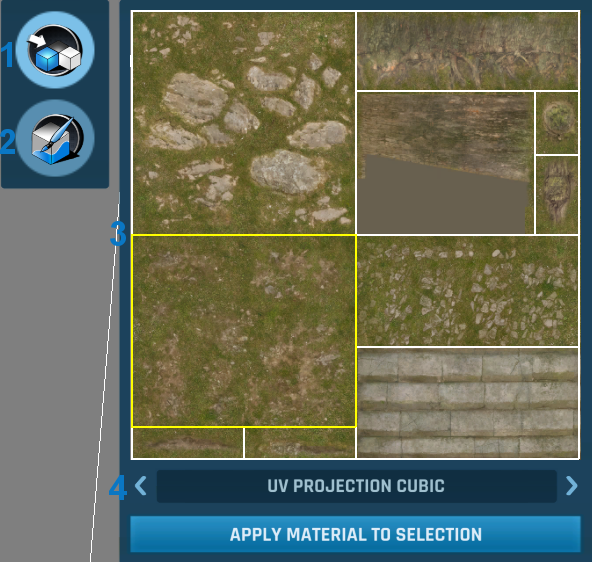
1.Select this mode to apply simply texture to object(s), face(s). Some box are preset. You have just to select which one you want.
Select how you want the projection then Apply Material to Selection when it’s seems good for you.
!Ctrl + Right Click : Pick current Material
2.Select this mode if you want to edit manually face(s) called usually UVs on the texture. It’s the Custom UV Mode.
!Hold Alt + Left Click to move in the UVs map
!Mouse Wheel : Zoom in or out in the UVs map
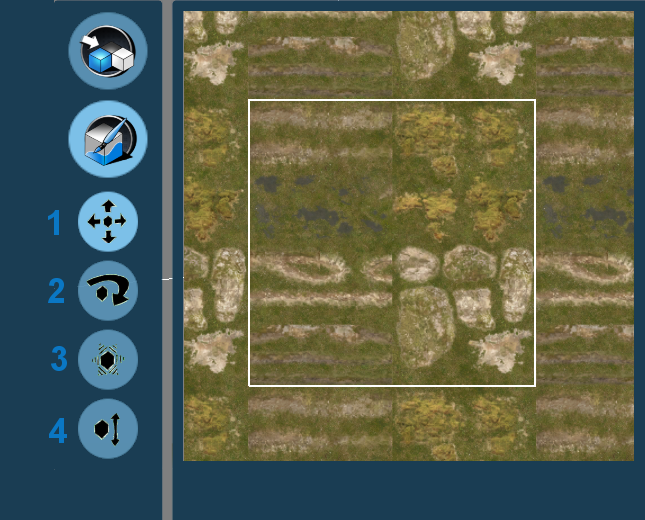
1.Move UVs. You can move vertice(s), edge(s) or face(s)
2.Rotate UVs. You can rotate edge(s) or face(s)
3.Scale UVs. You can scale edge(s) or face(s)
4.Scale UVs by face in one direction. You can scale edge(s) or face(s)
Demonstration Video
 1.Split (A) : Allows to divide face as you wish. Click on a face to divide it. This create a new vertice, edges and faces. Click on an edge if you want to divide a edge This create a new vertice, edges and faces
!This tool lakes a bit of accuracy whereas i think it should be the right method to cut. So there are some alternative to improve accuracy
2.Cut Hole (Z) : Allows to create our own face inside a face. It can be useful for hole and new extrusion, add details etc…Select face first, then create your face (at least 3 edges) and join the last vertice with to first to valide your creation. Other edge are created to keep your object clean
!Don’t hesitate to rework the topology if new edges created don’t satisfied you
3.Flip Edge (T) : Click on a edge to change his direction. This works only for Triangles (face with 3 edges). You need to have 2 Triangles close together and try to click on the middle edge, the topology should change
!This tool can destroy your mesh so take care when you use it. Try first to understand how it works with simple form. For example, create a plan, divide it once, then flip the middle edge. It should changes direction
4.Quads to Triangles (R) : Select Quads face(s) you want change then apply Quads to Triangles.
!If you works on a Cube, it allows you to create diagonal face easily
5.Subdivide Selection (E) : Allows to divide faces. To add details generally. Select object(s) or face(s) then Subdivide Selection.
!I advice you to subdivide Quads only to control how the subdivision will be
6.Subdivide & Smooth (Ctrl + E) : Allows to divide faces then smooth. It can be use to create organic object (rock, mountain…). Select object(s) then Subdivide & Smooth
!I advice you to subdivide Quads only to control how the subdivision will be. You can also select face(s) then Subdivide & Smooth face selection, but you have to rework on the surrounding topology
1.Merge vertices / faces : Click on Merge then Hold & click on vertice(s) you want to merge. The last vertice is the destination.
2.Simplify mesh : It will change Triangles to Quads when it’s possible.
!Normally it doesn’t affect the geometry, interesting to optimize your mesh.
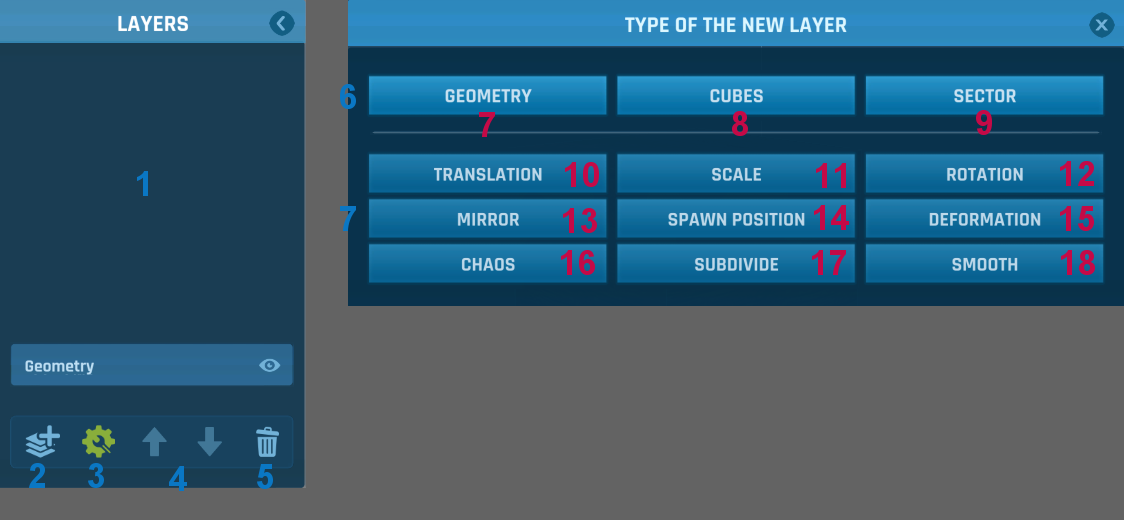
1.Layer Window
2.Add new layer
3.Edit selected layer
4.Move selected layer up / down
5.Delete selected layer
6.Add a layer (Object).
7.Add a layer (Modifier). Which impact all bottom layer(s)
Layer (Object)
7.Geometry : Ordinary use to make a new creation. You start with the classic cube.
8.Cubes : Allows to build like pixel art, only with cube. You can change the cube size (it affects all cubes). Can be useful to create simple creation quickly or in the case you are enough good to use Geometry. The mesh will be generally not optimized.
!Demonstration Video
9.Sector : If you want to create Checkpoint or Finich (Goal), you have to use Sector. The dimension can’t be change, only the position.
!Dont forget to define your Checkpoint / Finish in the previous menu to enable it. The waypoint option in the Item editor.
Layer (Modifier)
Layers Modifier are pretty similar to the usual tool that we can find in the mesh modeler. You can find some explanation in the previous chapter.
The difference is you can affect Geometry layer without to change the basic mesh.
They can be useful following what do you want to build and more efficient than to work only on the Geometry Layer.
You have to find first how will be compose your creation. And choose the proper layer.
10.Translation / 11.Scale / 12.Rotation / 13.Mirror / 15.Deformation / 17.Subdivide / 18.Smooth are explain in the previous chapter.
15.Deformation : Correponds to Block Transformation. 18.Smooth : Subdivide then Smooth operation
14.Spawn position : Allows to create Spawn
16.Chaos : Allows to generate noise on each vertices of your object. Change distance if you want to increase intensity
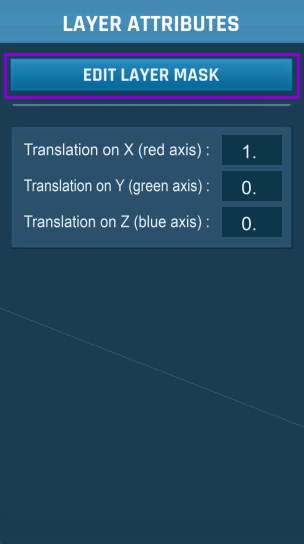
Click on Edit Layer Mask to select individually which object inside Layer Geometry you want affected.
When you select objects you want, the volume center change. You can for example test with the Layer Rotation how is the impact.
CUSTOM BLOCK
IMPORT ITEM FROM OTHER ENVIRONMENT
MY REQUEST TO NADEO
Not my exhaustive list (always evolutive) but i will try to write all i have in my mind.
- Improve accuracy, we are actually restricted at “4”. “1” Will be better
- Add a grid to snap vertices / items on it. Grid could be scalable
- Add an option to make the Mirror between the Origin
- Add Layer Array (multiply Geometry on a axis or multiple axis, with incremental distance)
- Some textures are missing, like spawn / checkpoint textures
- Possibility to change dimension of Sectors. Possibity also to change it for a Rectangular shape in plus of the actual Circular
- Possibility to align vertex / selection of vertices easily
- Add Ghost mode possible (actually when an item is close to a normal block, if we delete the block, item is deleted too, really annoying)
- Light item
- ColorClan Item
- Add a key to zoom in the selection
- Layer mirror, add a button to reverse it > https://forum.maniaplanet.com/viewtopic.php?f=658&t=45391
- Tool to cut a face easily > https://forum.maniaplanet.com/viewtopic.php?f=658&t=45386
- Sphere and Disc Mode > https://forum.maniaplanet.com/viewtopic.php?f=658&t=45334
- Inset a face tool > https://forum.maniaplanet.com/viewtopic.php?f=658&t=44880
- Block Deformation, Add a way to know or type the number of loop created > https://forum.maniaplanet.com/viewtopic.php?f=658&t=44671