USUAL CREATIONS IN MAP EDITOR
- INTRODUCTION
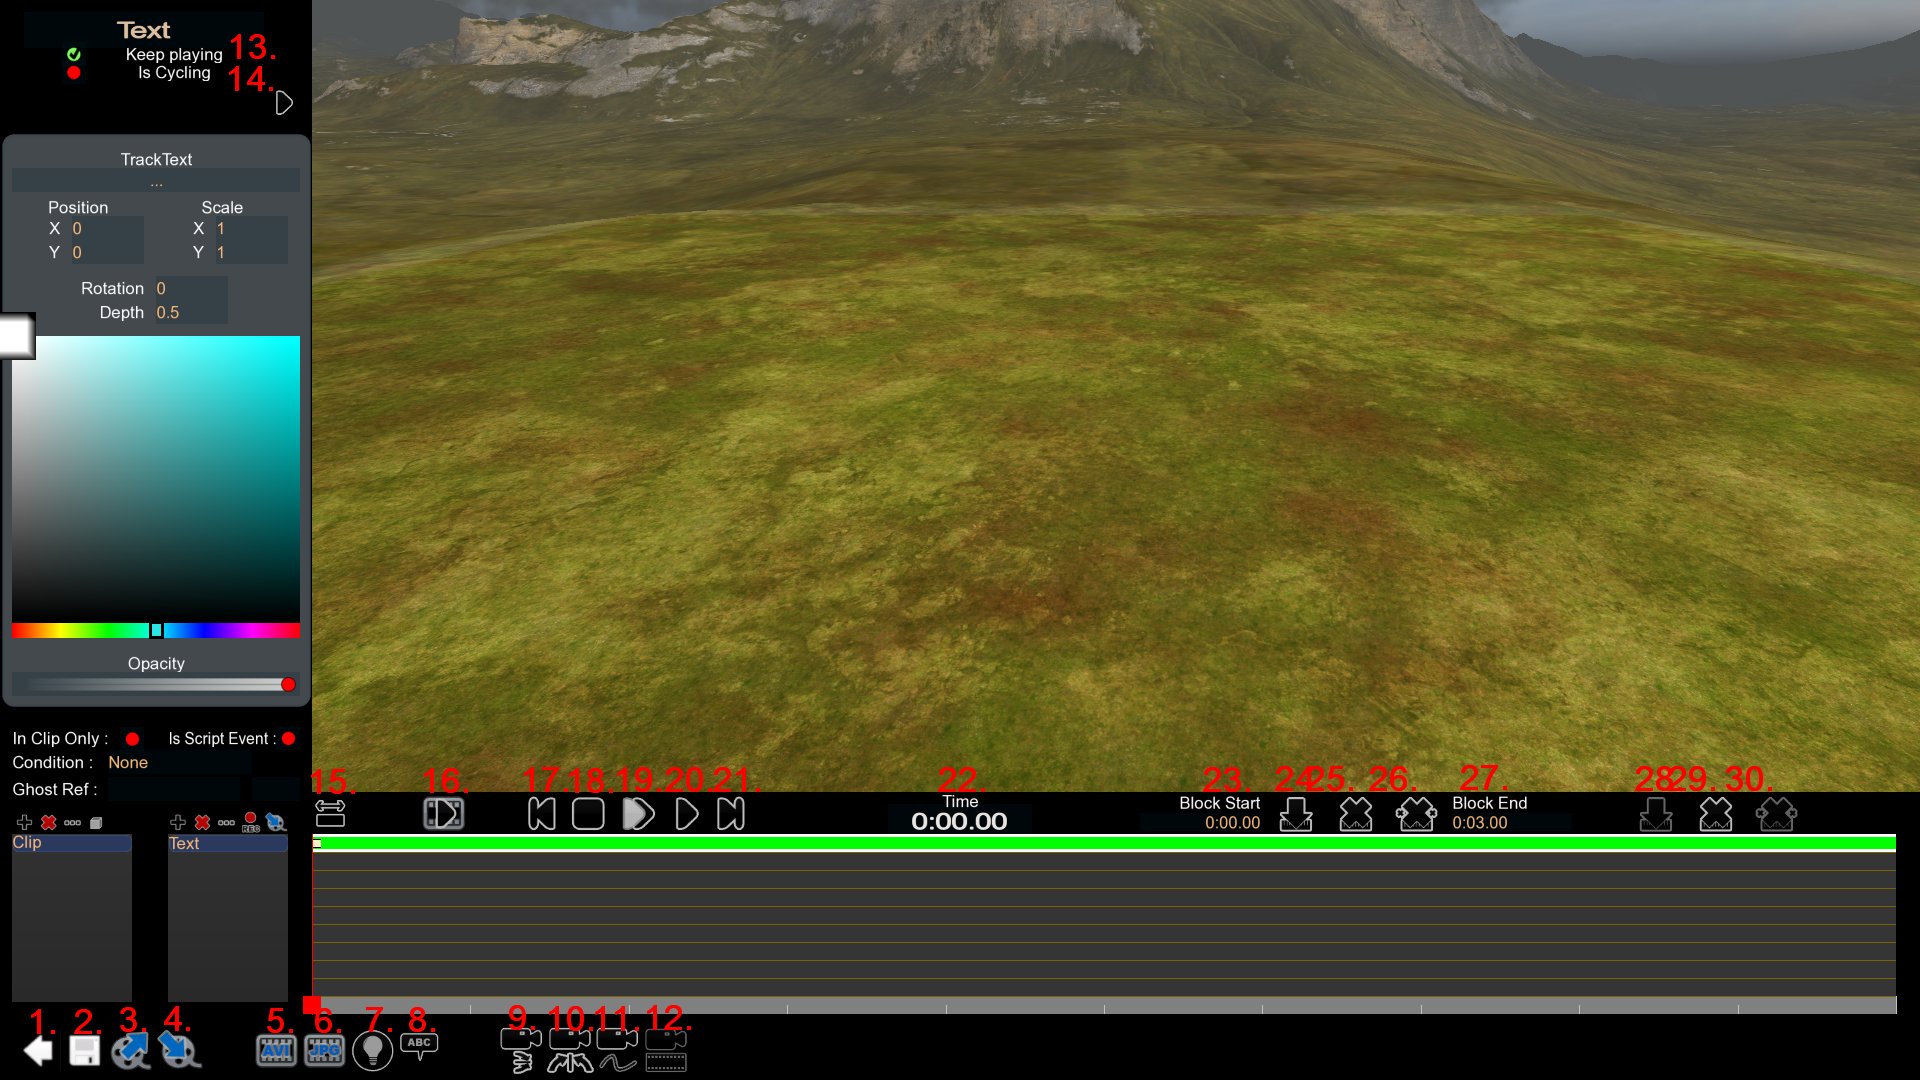
- ADD AN ANIMATED TEXT
- FADE TO BLACK
- COLORING BASE (checkpoint/pole)
- CREATE A FOG
- RECORD A GHOST
- CYCLING & ALTERNATION OF COLORING
- ADD A PERSONAL IMAGE/SOUND
- CREATE AN OVERLAY
- LOCATOR
- IMPORT/EXPORT CLIP
- EXAMPLES OF SEQUENCE (intro, podium)
USUAL CREATIONS IN REPLAY EDITOR
INTERFACE
- Exit
- Save
- Export clip
- Import clip: List all the clips available in the folder
Documents\Maniaplanet\Replays\Clips - Shoot video
- Shoot image
- Compute shadows
- Display player name
- Reset yaw
- Reset roll
- Switch to free camera
- Switch to clip camera
- Keep playing block
- Cycling block
- Show full time line
- Preview
- Go to first frame
- Stop
- Slow forward
- Normal forward
- Go to last frame
- Reading position
- Block start
- Insert block
- Remove block
- Cut block
- Block end
- Insert key
- Remove key
- Remove all keys
CLIP & TRACK
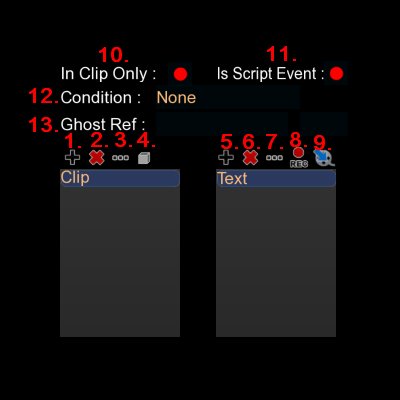
- Add clip
- Remove clip
- Rename trigger
- Edit trigger
- Add track
- Remove track
- Rename track
- Record a ghost
- Import ghosts: List all the ghosts available in the folder
Documents\Maniaplanet\Replays - In clip only
- Is script event
- Condition start trigger
- Ghost Ref
SHORTCUT & TIMELINE
FOR MEDIATRACKER & MAP EDITOR view
Right Click in the Timeline to zoom in / out
Hold Mouse wheel in the Timeline to move around it
TAB : For a fullscreen visualization
Copy/Paste properties of a key : Select the key that you want edit, hold Ctrl and click on the key that you want copy. The key selected is instantly edited.
Copy/Paste time of a key : Select the key that you want edit, hold Shift and click on the key that you want copy. The key selected is instantly edited.
Duplicate track : Select the track that you want copy. Pressed Ctrl + D. The track selected is instantly copied. Some tracks are unique and can’t be copied twice.
Select multiple keys of different tracks to move : Hold Alt and Left Click in the bottom grey border for a start and Left Click for the end while holding Alt. Now you have multiple keys selected, just Left Click on one highlighted and move it to move all of them at the same time.
Freelook mode
(Hold ‘Alt’)
Hold right mouse button : Look around
(Hold ‘Ctrl’)
Hold right mouse button : Roll camera
Arrow keys : Move around the map
Mouse wheel : Zoom In/Out
+/- : Change camera speed
USUAL CREATIONS IN MAP EDITOR
INTRODUCTION
Note : Some effects are only visible for the editor and players when the PostProcess FXs are activated in the launcher.
So effects are more useful in Replay Editor when you realize an editing.
In map editor, right click on the MediaTracker in the right bottom.
You have access to different sequences.
Select the one which interests you.
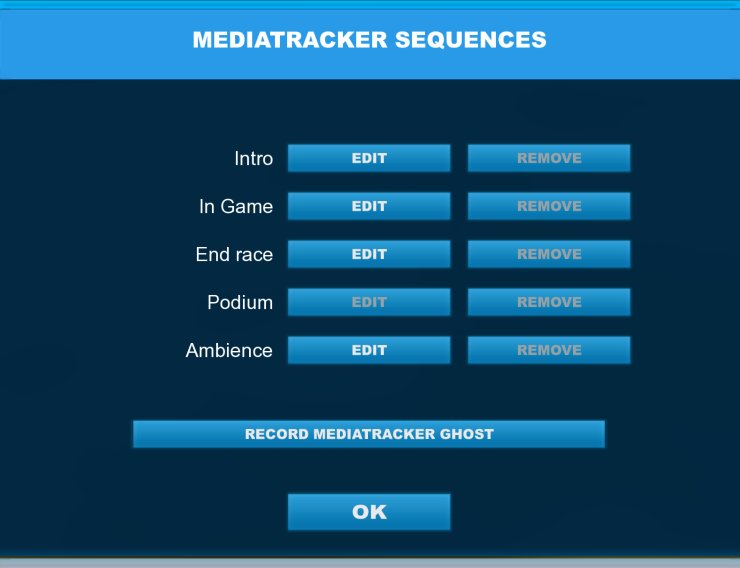
Intro : An intro is shown in the beginning of the map on a server.
You can, for example, show a few places around the map, as well as display the name of the map and the author.
In Game : You can place Clips on the map that trigger a MediaTracker event when a player touches them.
It’s possible to create a story (with additional images, sounds and text), a guide for the map, change the amount of fog…
End Race : This doesn’t seem to work.
Podium : You must have placed a podium on your map to edit this.
You can edit the visuals that the players see after the map finishes.
Ambience : You can change the ambience of the map. The effects in Ambience have a priority over the In Game effects.
Record MediaTracker Ghost : This doesn’t seem to work.
ADD AN ANIMATED TEXT
FADE TO BLACK
COLORING BASE (checkpoint/pole)
CREATE A FOG
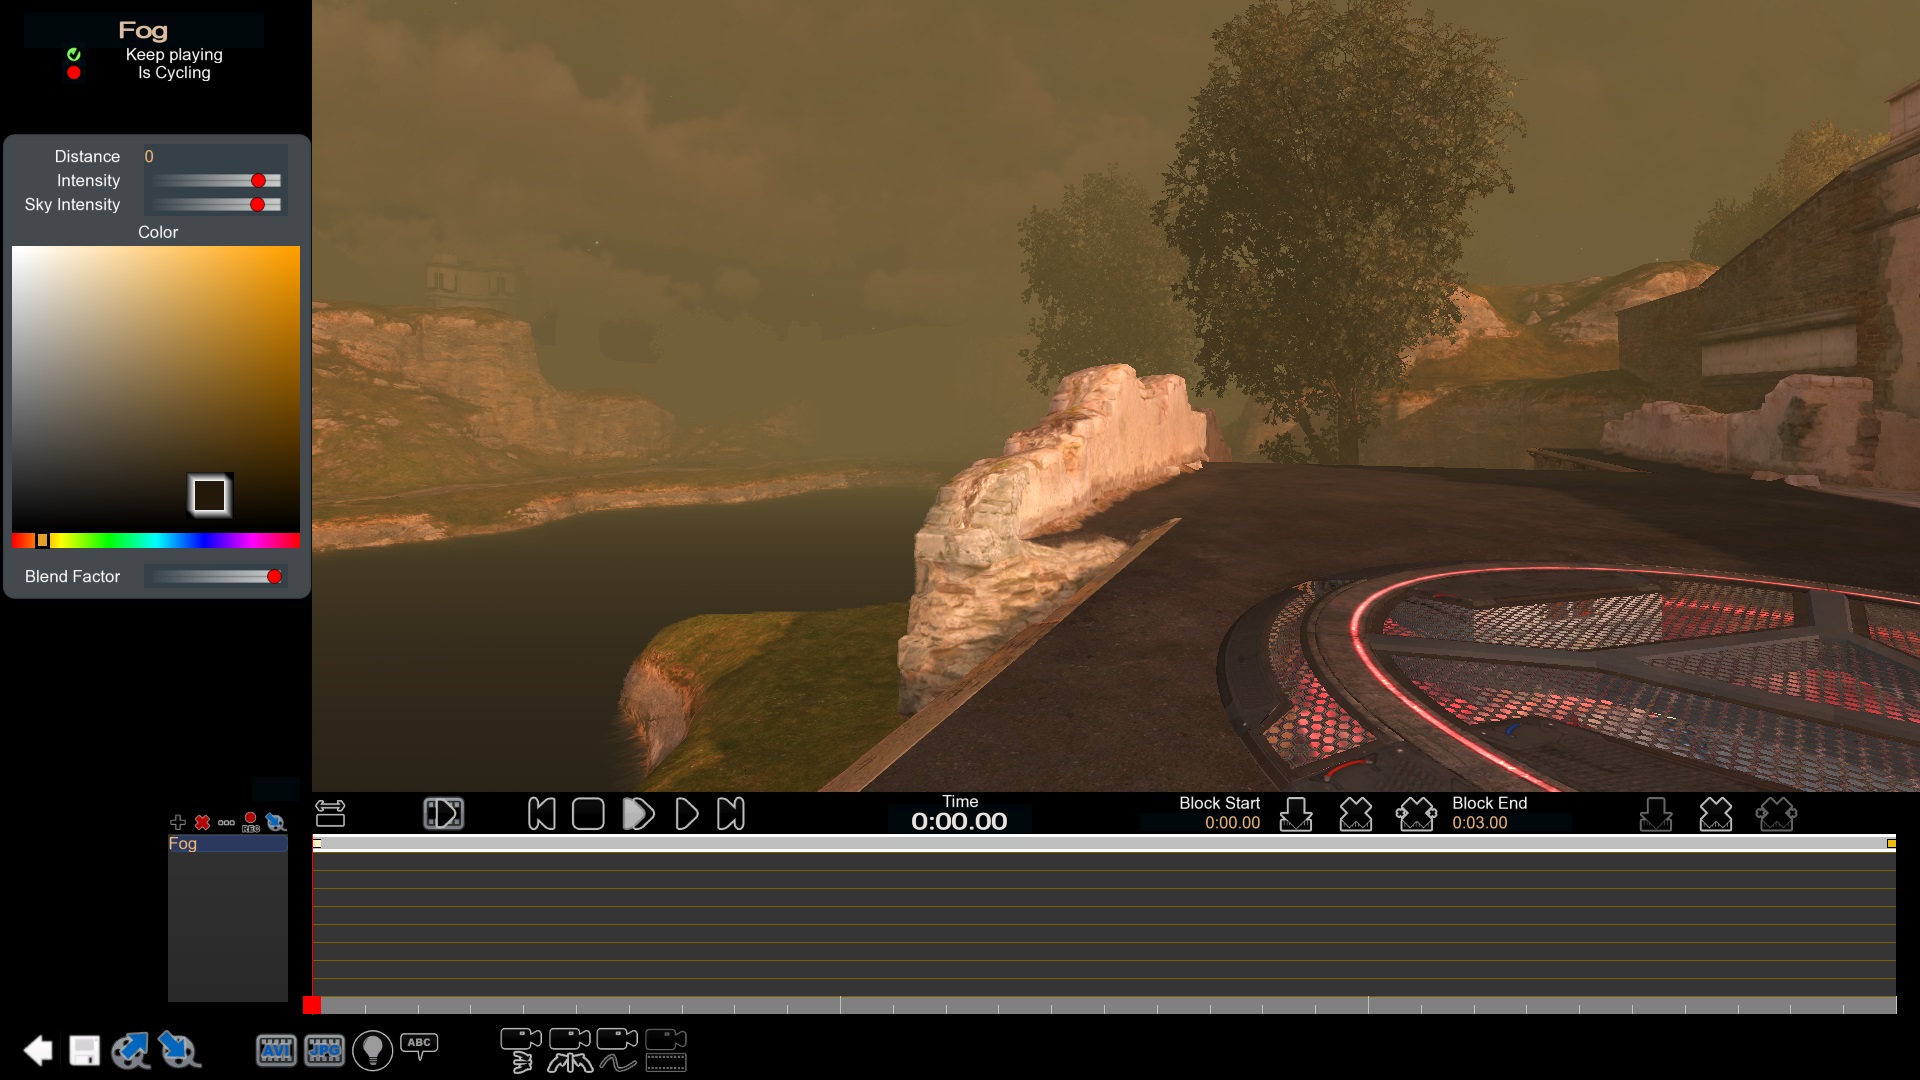
- Edit the MediaTracker Ambience or In Game.
- Add track “Fog”
- Be sure that “Keep Playing” is enabled
- Edit the first key and experiment with the fog (you can try the parameters above)
- Copy/paste the first key to the last if you want a continuous fog.
- Save the MediaTracker and test it.
A larger value in distance results in the fog being further away from the player.
Increase the blend factor to better observe what Distance, Intensity and Sky Intensity do.
You can use multiple keys in one block to create a moving fog, or a change in color.
RECORD A GHOST
CYCLING & ALTERNATION OF COLORING
ADD A PERSONAL IMAGE/SOUND
In a clip, create the track (Image or Sound) and choose the file you want.
Before that, you need to prepare your file.
Go to Locator for this step.
CREATE AN OVERLAY
LOCATOR
Note1: Do not launch Maniaplanet until the locator is ready.
Preparing your files in the ManiaPlanet folder.
Put the sounds in the folder : Documents\Maniaplanet\Media\Sounds
Put the images in the folder : Documents\Maniaplanet\Media\Images
Put the skins (in this case, ShootMania skins) in the folder : Documents\ManiaPlanet\Skins\Models\ArenaPlayer
Put the horns in the folder : Documents\ManiaPlanet\Skins\Horns
etc…
We will use a sound in our example. The sound has to be converted in .ogg format, if it hasn’t already.
After that, the sound is placed in Documents\Maniaplanet\Media\Sounds
We will create a .txt file in the same folder, with the same name as the sound file.
![]()
Open the .txt file and insert the URL of the uploaded file (click here to see the methods to host the file).

Save and close the .txt file
Rename the .txt file to .ogg.loc
![]()
Your locator is now finished and the file is ready to use in ManiaPlanet.
2 methods to host your files : Use your dedicated server if you own one or Use a software/site (dropbox, maniaCDN, ImagesPark…)
If you use your dedicated server :
Preparing your file on a dedicated server..
In this example, the dedicated server used is on Ubuntu.
For clarity, create a folder called “locators” here > /var/www/html/locators
Place a copy of your file in the “locators” folder and try to open it in your browser with the URL > serveripadress/locators/nameofthefile+extension
A download should start for the file.
Save the URL, as you’ll have to put it in the .txt file.
If you use a software/site :
Example of a software/site > dropbox / maniaCDN / ImagesPark
In this example, we will use Dropbox.
Place a copy of the file in your Dropbox folder.
Get the URL for your file.
Modify the URL as shown in the picture so it works properly (remove the https://www. and set dl=1).
![]()
Save the URL, as you’ll have to put it in the .txt file.
IMPORT/EXPORT CLIP
If you have a clip that you want to save and use for other maps, it’s practical to export the clip.
The clips are saved here : Documents\Maniaplanet\Replays\Clips
You can export a clip made in the map editor’s MediaTracker as well as the replay editor.
Pay attention with multiple camera tracks if you import a lot of clips with different cameras. One camera could be enough.
It is possible to import multiple clips with multiple ghosts and synchronize them to the same run. Look the section > Assemble & Synchronize Player From Replay
EXAMPLES OF SEQUENCE (intro, podium)
Intro Sequence
The intro shows in the beginning of the map on a server.
You can use an intro to display the information of the map (name of the map, author) and to show some parts of the map.
Note : I used an “Image” to do the fade to black, it’s an old habit, sorry for that. It’s preferable to use the block “Transition fade”.
Podium Sequence
The podium sequence doesn’t last longer than 5 seconds.
Try to make one that lasts for 5 seconds if possible.
If the sequence is shorter than 5 seconds, keep playing the black screen image (in the video, i forgot to do that).
Note : I used an “Image” to do the fade to black, it’s an old habit, sorry for that. It’s preferable to use the block “Transition fade”.
USUAL CREATIONS IN REPLAY EDITOR
INTRODUCTION
Note1 : Make sure you activate the PostProcess FXs on the launcher if you use some effects (FX color/Depth of Fields/FX DirtyLens…).
Note2 : You must have saved a replay on your computer. To do that, press Y while playing or Escape > Advanced Options > Save Replay.
Note3 : In modes the replay starts from the beginning of the round/switch of map or from whenever you joined the server.
Note4 : Only the 20 first minutes are recorded in the replay.
MONTAGE, FIRST PERSON (METHOD#1)
MONTAGE, FIRST PERSON (METHOD#2)
CREATE A SLOWMOTION INGAME
Note : If you want to create your slowmotion with an external software, shoot your video with a high fps. If you want your slowmotion to be 50%, at least double your fps. If you want your slowmotion to be 25%, at least quadruple your fps.
CAMERA CUSTOM
MULTIPLE CAMERAS
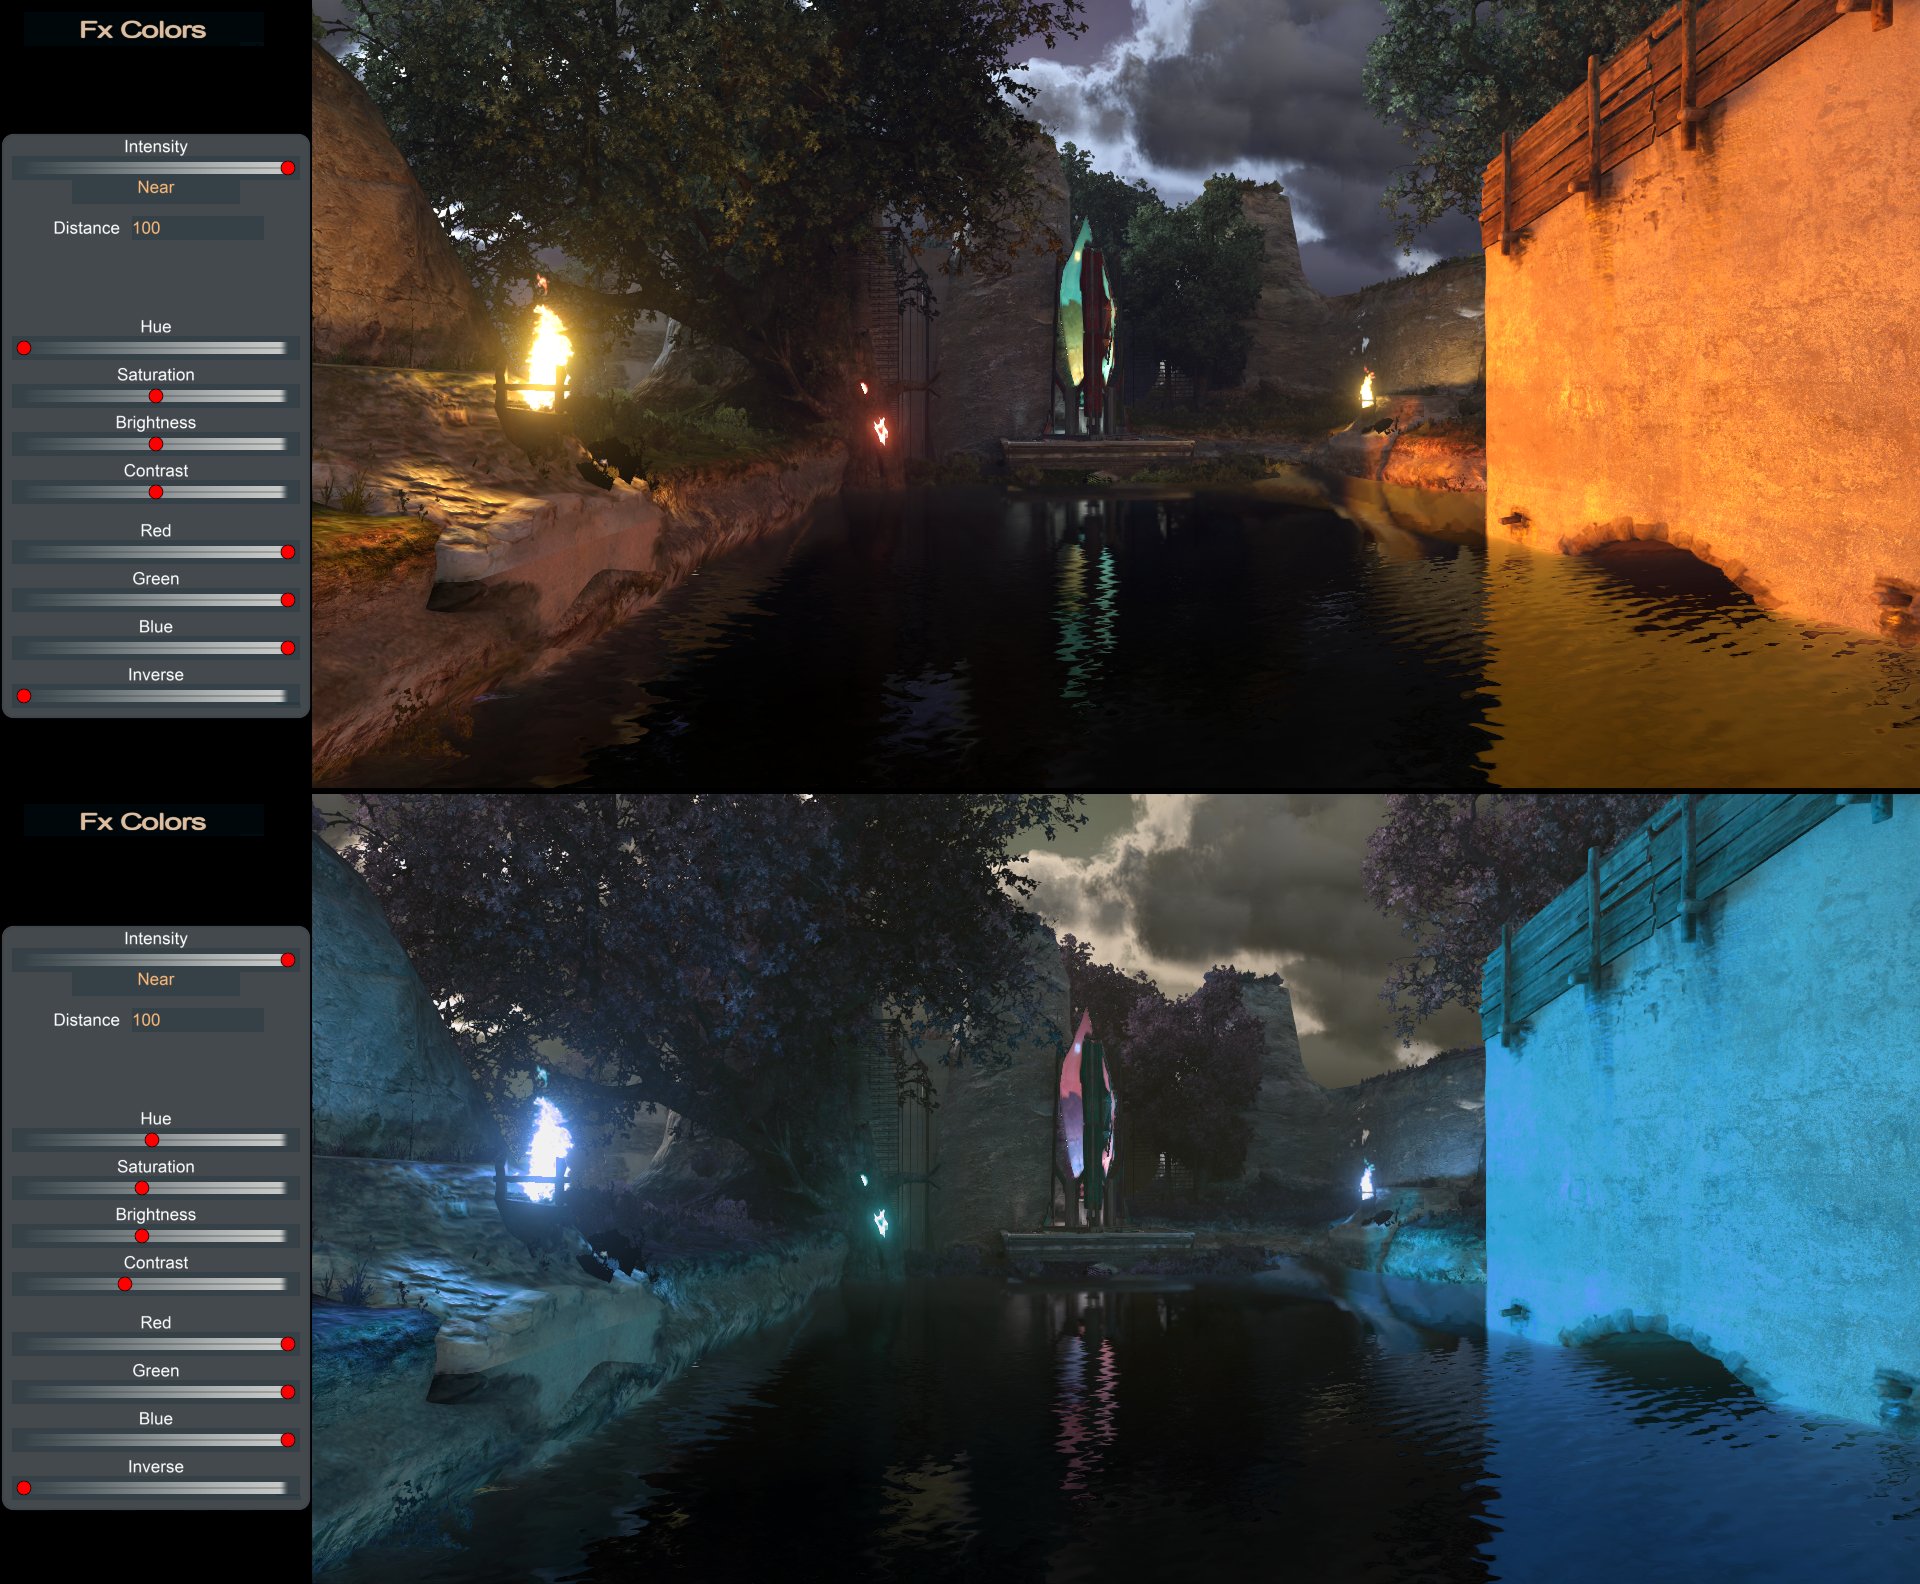
FX COLORS
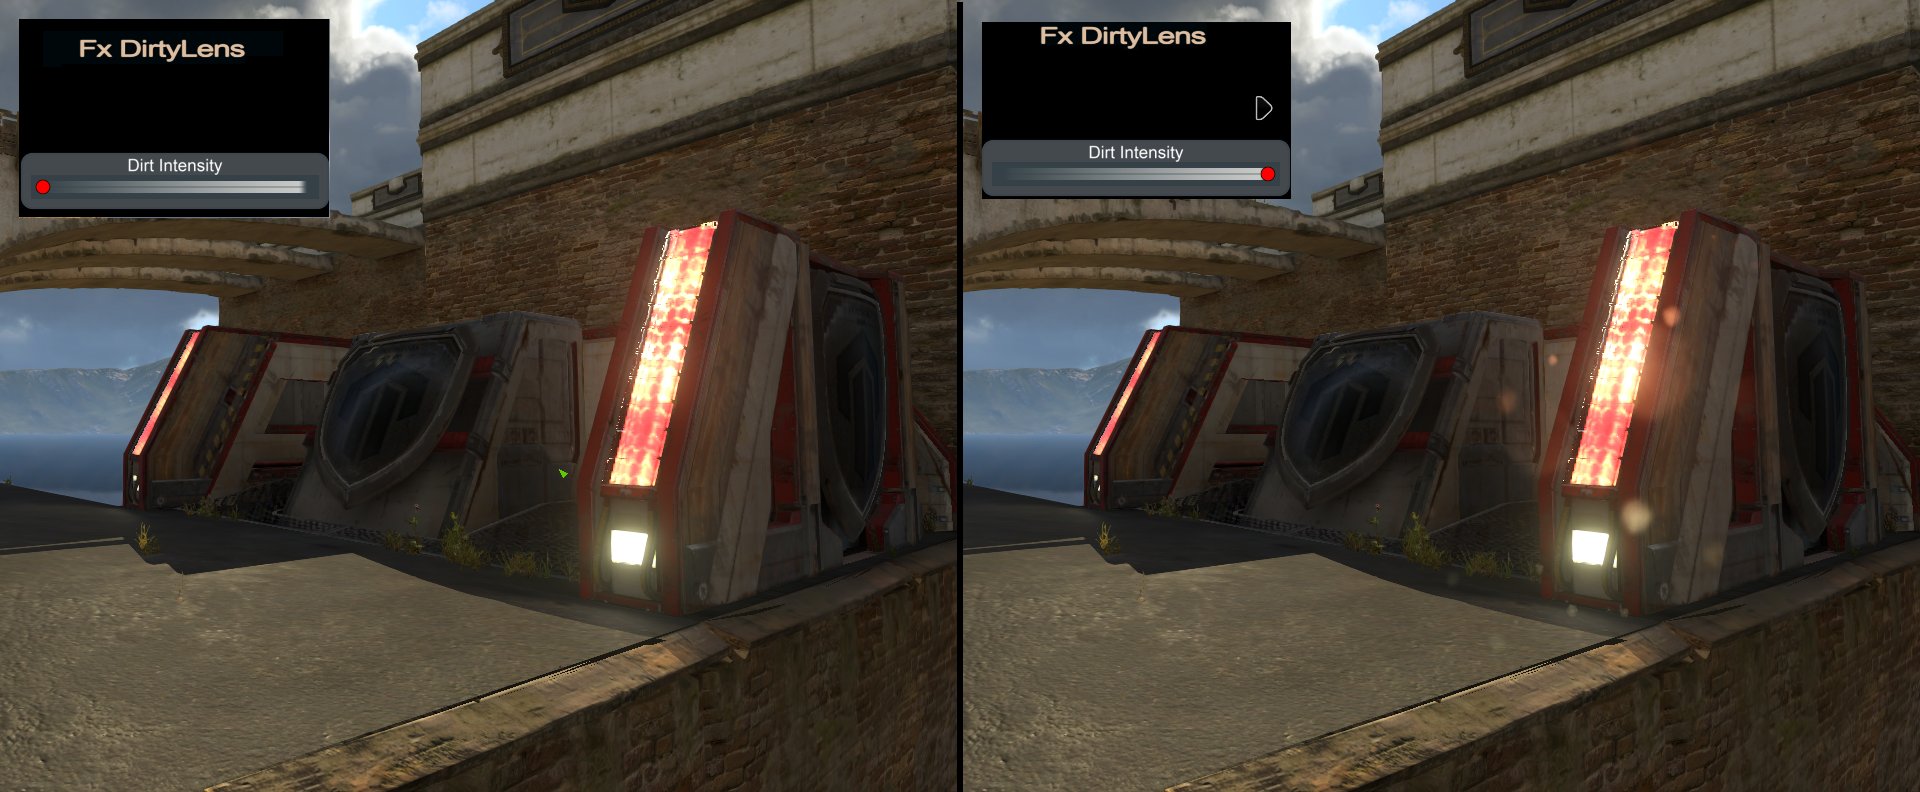
FX DIRTYLENS
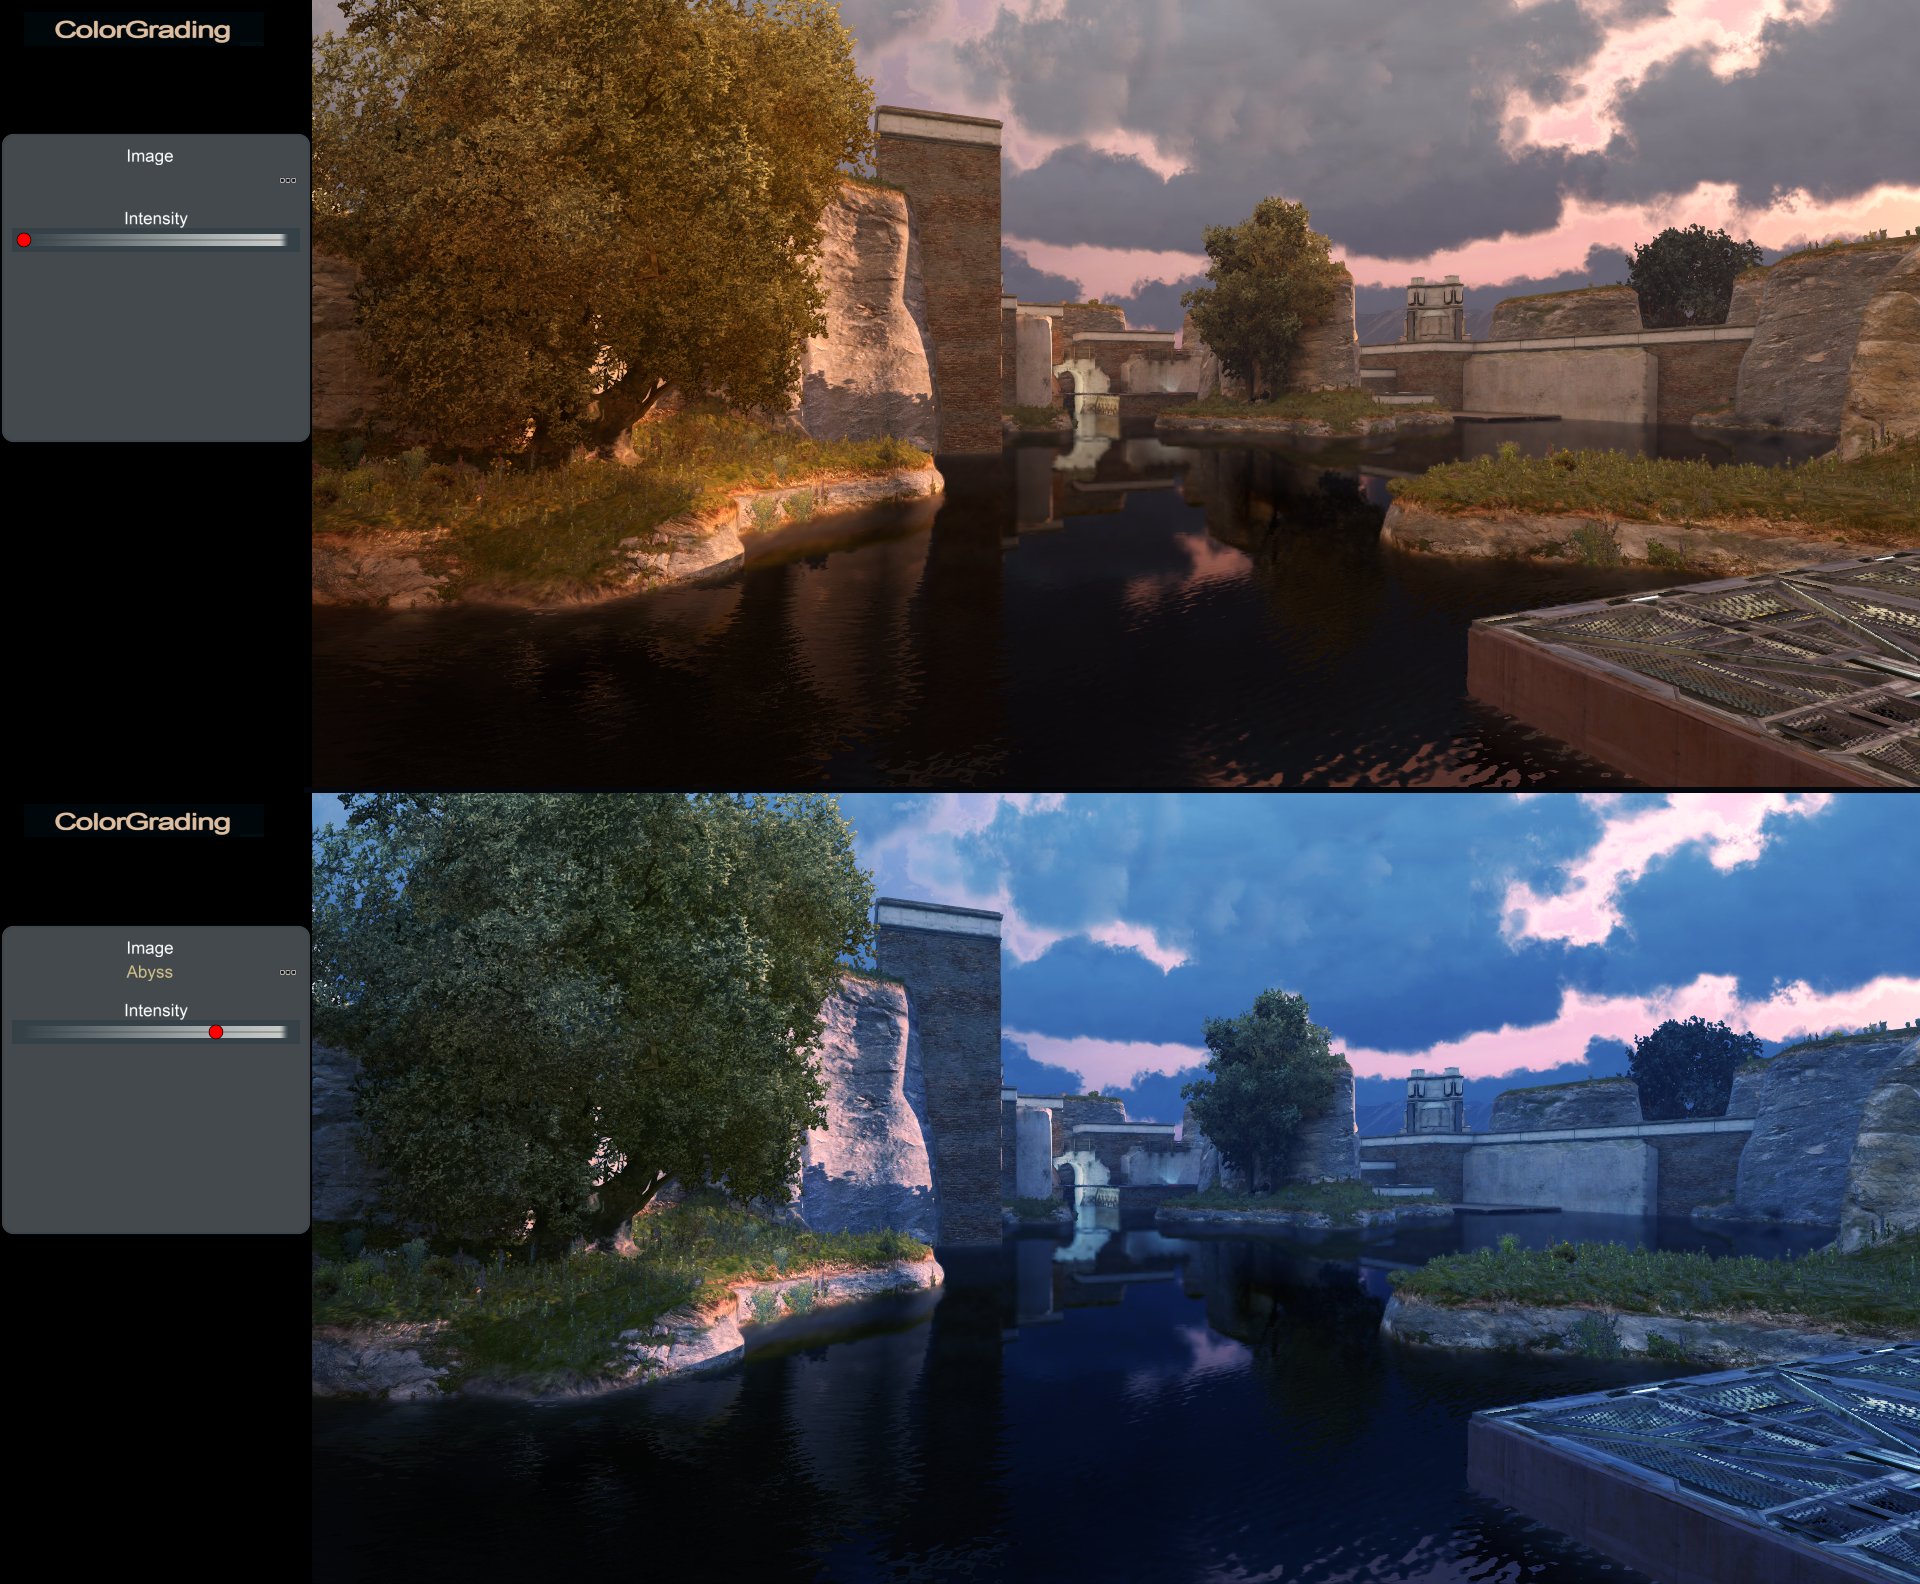
Color Grading
RENDERING
I have few tips for rendering. Here’s my typical way of making a video for YouTube.
Resolution : Width: 1920 Height: 1080 (to have 1080p on YouTube)
FPS : 60 (at least, and unless you want to make a slowmotion with a video editing software)
File format : AVI (I usually do the editing later, so I prefer to have the best quality source)
SHOW ADVANCED PARAMETERS
Antialias : 9 at least
Sharpen : Yes
Audio stream : Yes
Car reflects : Yes (maybe not functional in Shootmania, i let it on by default)
All the rest is disabled.
If you used the track Depth of Field while editing, enable it.
Click here to see a very useful video from DaniXks.